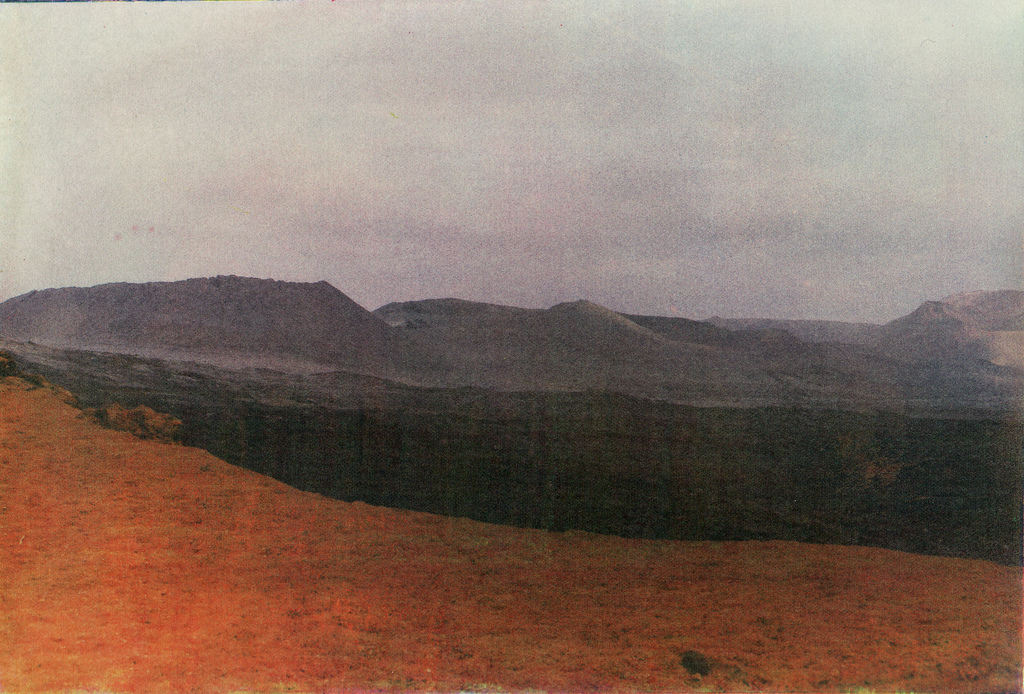
26.10.12

Scanners: The »Missing Link« finally arrived!


It's been a while since I used to use my own, now defunct film scanner. It was a flatbed Mustek Bearpaw with the transmission mode scan option. It wasn't a stellar scanner, but you could scan 35 mm images and get a decent quality 20x30cm prints from a Frontier machine, or a decent A4 inkjet contact negative to use with alternative photo techniques. But it died some years ago....well, it's performance did (and who will ever repair an obsolete scanner?). All in all, it wasn't a bad scanner considering the price at the time. For a couple of years I was actually relying only on outsourced scanning-be it made by a friend or by a photo lab. Fact is that I was shooting mostly slide film in that period and scanned only selected images. Fact is also that all that time I was toying with the idea of getting a »serious«, medium format scanner. MF scanner prices were never low (new or used ones), but looks like their prices even skyrocketed a bit in the past time (for respectable used models). Then, I was waiting for the (so long) announced OpticFilm 120-until its price has been disclosed...no, thanks, I said-for such an extra premium in price I can rely on outsourcing for scanning medium format film, for many many years. So I got annoyed of myself not being able to decide which scanner to get. And owning a good scanner is always a good thing....
Anyway, finally I decided to get a Plustek scanner, more precisely the 8200i SE model. Just arrived yesterday! I am still in the need to install it, can't wait for the weekend to test it!


I chose the intermediate model of this Plustek scanner line, since the 8100 model doesn't have the nice and useful feature of IR detection (and removal) of scratches and dust particles, while the 8200 Ai model costing over 50 % more than the 8200 SE (and more than double of the 8100), but having the auto IT8 calibration feature seemed to me way too much. Optically-sensor and lens wise-all 3 scanners are identical, save the mentioned features. While the IT8 calibration is surely a nice (and expensive addition), it can be compensated by a much cheaper solution: you can shoot a test image of a (reasonably priced) color-checker chart (yes, those which became popular among digital photographers, but they existed also before...) and then set and save you color curve values in an image editor for any given film type. You can even borrow from someone a test chart for a day or so and have the job almost done. That's it! Anyone who ever worked in the darkroom for a while can get a grasp of such a procedure. And, if you really want to go crazy, you can buy ready-made IT8 targets on specific film emulsions-check this link for these outrageous prices! If I knew before, that would be my best investment in a Kodachrome film....just kidding
Note: if you shoot only BW film, even the IR dust removal feature is useless, unless you are using chromogenic BW film. So in such a case you can save some money too.

24.10.12

Portfolio of the Week: Giangiacomo Pepe


Dear Analog Photographers,
so far, we've been dealing mostly with portrait photographers, right? This week we decided to push that boundary even further, so let me introduce Giangiacomo Pepe from Genova, Italy. Giangiacomo is a young photographer (in his late 20's) and his main subjects are female nudes. Since we are not an adult-rated site, we needed to carefully choose the photos to (hopefully) comply to rules. Giangiacomo works with various 35 mm cameras, from Nikon to Contax, and uses various BW films. Sometimes, he also uses a Polaroid. The lighting source mostly used is flash in the reportage-style fashion. His shooting style is actually quite »guerilla-style«,  »haiku« or even Terry-Richardson-style, if you prefer. The backdrop of his shots are ordinary places-apartments, bedrooms, gardens etc. 
While at first glance his photos might not look glamorous or sophisticated, I think this is also the very charm of his work-breaking the established composition (and other) rules, bringing us for a while back at the very primordial photographic basics, but also intimately closer to his subjects. I think many of his photos could be accomodated equally well either in a gallery or a personal album. Besides nudes, he also began on a few reportage projects. Giangiacomo's other (and more explicit) work can be found on Tumblr.
Mitja


 All photos copyright: Giangiacomo Pepe

22.10.12

Monday column: Photographic Subject of an Analogue Photographer


Photographic subjects are very personal thing and differ from a photographer to photographer. But are they different from, let say, a digital photographer subjects? Yes and no, I would say. Let’s say. Now days you will not shoot sports with analogue camera. Maybe I’m wrong but I don’t see much sense in it. Specific for shooting sports is high “frame rate” so you can get (catch) the perfect moment, so waste of film. This is why they invented digital in the first place. No, an analogue photography is all opposite than sports photography. It’s not about taking as much shots as you can get and hoping that you get the right moment. It’s workflow is slow and deliberate. You must have pre-visualised scene, and then you wait (if you have to) for the right moment.
 

But analogue photography is not about analogue vs. digital technique or convenience, it’s all about aesthetics. Aesthetics evoke emotions, so we can conclude that analogue photography is photography of and about emotions. What are most common photographs which include emotion? First thought is about portraits but we can add nature and landscape photography. Human portrait is all about emotions of another human being and landscape or nature is all about our emotions that we project outwards and then take a picture of it. But, you will say, that this could be done with digital camera also. My answer is that analogue photography has its specific look that it can be simulated by digital workflow but it’s only that, a simulation. Every film has its own signature, which it can be used to emphasize the emotion that we want to catch or message to say.


But this is only my vision of (analogue) photography. You may have (you have!) your own. Let’s take some photographs, catch some emotions and tell a story.

Matjaž

19.10.12

About Two-Bath and Highly-Diluted Developers


First, I must confess: I developed only one batch of films several years ago with a two-bath developer. After that I didn't use them for the simple reason I overstocked much of the BW chemistry in the darkroom (conventional developers), so I needed to get rid of that chemistry first...and it takes some years to do so. But I just decided to give them a go again, to these simple but excellent developers, in the following weeks.

Two-bath developers have been very popular in the past; their use never stopped, but in the past decades only a limited number of photographers were consistently using them. There are really many formulas around, but basically the first bath is only a solution of the active agent (metol, hydroquinone, catechol etc.) and a preservative (sulfite), while the second is just an alkali bath (usually NaOH) . When we first soak the film in the first solution, the film emulsion absorbs the active developing agent but the development hasn't started yet. Then, when we switch to the second bath (with just little agitation), the development starts because of the alkaline pH. The development in more exposed (denser) areas of the negative is of course quicker, but it also stops (or slows down) faster because the developing agent is more quickly exhausted. Inversely, the development in less exposed areas goes on for a longer period, and these areas gain more density relatively to their exposure. In other words, two-bath developers are highly compensating; they produce a usable negative (almost) regardless whether the photographic scene was of low or high contrast. Very usable for roll films (less for sheet film where you strive to have complete control) where many different shots are made on a single roll. Given the increased density of shadow areas, they are regarded as speed-increasing developers, at least some of them. A nice feature is also about the developing times (of individual baths) and temperatures; they are very little affected by, since the development is mostly governed by developing agent exhaustion. Similarly, using the same approach with different films produces good or at least usable negatives. Two-bath developers are also very economical; the first bath virtually lasts as long as there's any solution to soak the film (well it's still better to change it a bit more frequently), while the second solution can be prepared fresh, since its cost is neglible.
Highly diluted developers (the most known is surely Rodinal, like 1:200) are also known for their compensating effects, but in that case the main driving force is diffusion-that is, temperature plays a bigger role in the development, as also the (low rate of) agitation technique. Because of that, using highly diluted developers is more likely to produce unevenly developed negatives (because of low agitation rates). Also, the long development times required (like 1-2 hours) inevitably produce more grainy negatives. However, highly diluted developers are quite good in producing the »edge effect« in negatives, enhancing the apparent sharpness of the image. On the other side, developing in highly diluted developers reportedly produces image that are somehow »dull«-uninteresting in mid-density areas. But this is also a matter of taste.

Below are some of the most known two-bath formulas:

Pextral 2-bath:
Bath A
1.5 g Pyrocatechol
0.3 g sodium sulfite
Water to 300 mL

Bath B
6 g sodium hydroxide
Water to make 300 mL

This is a staining developer, as other pyro-type developers, acting also as a gelatin hardener. 
2 minutes in bath A, 1 minute in bath B. Use this as a starting point only.


Divided D-23 developer (used also by Ansel Adams):
Bath A
100 g sodium sulfite
7.5 g metol
Water to 1 L
Bath B
2 g borax
Water to 1 L


Barry Thornton formula
Bath A
80 g sodium sulfite
6.5 g metol
Water to 1 L

Bath B
12 g sodium metaborate (Kodalk)
Water to 1 L


The last formula is apparently just a slight variation of the divided D-23, but it usually somehow gives more »energetic« negatives, since the second bath is more alkaline, therefore more active development occurs. It's been also one of the most regarded contemporary two-bath developers. For both of these developers, 4-5 mins in each bath are a good starting point.

A note about modern films: early films used to have a much thicker emulsion layer, therefore they absorbed more of the solution A. Modern films, especially films with tabular crystal structure (Tmax, Delta, Acros) have a much thinner emulsion layer. In case you find the negatives to be too »thin« (underdeveloped), a good way to improve the negative density (and contrast, while still getting consistent results) is to increase the concentration of the developing agent in bath A to allow more active development (keeping the sulfite concentration unaltered). 
The widespread use of thin-emulsion films was one on the main reasons why the use of two-bath developers vanished.

17.10.12

Random Quote


»In my vocabulary there are two bad words: art and good taste.« Helmut Newton

Portfolio of the Week: Hans de Bruijn


Dear Readers,
Every week we feature an outstanding photographer, but Hans is also a particular one somehow else-he is entirely dedicated to gum bichromate printing. Hans is from Gouda, Netherlands. He's also been in the professional photo business for a while in his youth years, as he finished the Fotovakschool in The Hague in the 60's. Then, after a long carreer in the IT industry, the ancient photo techniques raised his interests in collecting vintage cameras and literature, and gum bichromate printing. After a course in gum printing, he was totally hooked on it. Being a perfectionist by nature, he really strives to bring the gum bichromate printing as close as possible to the original photo. Therefore, he sometimes has to bring up more than six layers of pigment to achieve his goal as close as possible. The artistic look of the photo is of secondary importance. But hey, how can we define what is artistic and what's not? Gum printing is definitely an art in itself. Anyone who has ever tried it will agree. These are just a few of the many beauties of gum printing-there are no rigid rules, there is a lot of freedom in choosing the color palette of your choice, the paper texture etc. And, as Hans states: “The making of gum bichromate prints, aside from working with beautiful materials, is so time consuming that it forces a person to de-hurry. And the result will always give satisfaction.”
In recent years (sadly for us), many of Hans' gum prints are derived from digital photos. But which is also a good proof of how gum printing can be also a nice linkage between traditional and contemporary photo techniques. But Hans was very kind to provide us with gum prints derived from film only. Hans is now happily enjoying his retirement by avidly making gum prints. He also gives gum printing workshops from time to time. You can find Hans' work and other info on his website and on Flickr. Enjoy his photos posted here, but I also openly invite you to visit his websites too!
Silver regards
Mitja


All photos copyright: Hans de Bruijn

15.10.12

Monday Column: Photographic and Not so Photographic Trips


Have you ever planned a trip and, as all of us, who think about ourselves as a photographers, take with you a photographic camera of some sort? Of course you did. But on what kind of trip or voyage did you go. A family trip, business one, tourist voyage... Did you take with you almost most of your gear you own (camera, backup, several lenses, tripod, flashes, etc.) and then didn’t used more than one camera with one lens? Have you been ever found in a situation, when in company you were always last of the group and always waited, because the ordinary tourist view and snapshot didn’t meet your photographic standards?


If your answers are mostly yes on to those questions you probably have badly planned your trips. The kind of trip that includes all sceneries in one afternoon, it is not a photographic trip at all! The time is essential for the photographic trips. This means only one or maximum two different sceneries of a day. Preferably you visit first scenery in the early morning when the sun rises and other in the late evening when the sun sets. And around the noon is the siesta time for photographers. We all know why. Do we?


But when we go to a non photographic trip (and we all do them) as a responsible photographer we must properly equip. At all we all want some images from our voyages, no matter if it is business or whatever trip it is. At least I when I go to a trip that is not strictly photographic I try to equip properly, this means light. Only one camera and one lens, a rangefinder instead of a SLR, a smaller lighter, non intrusive option. But then once a year you must go on the photographic trip and take with you all gear you might need or think that you do. But this means that this trip is all dedicated to taking photographs, slow without distraction. This means no time limits, places to be seen in limited time, no people that are nervously waiting for you, no family who aspect your presence in the real world.


Last time I was asking about what photographic camera should I take with me on mountain hike. I knew that it must be light, because it would be just high pace mountain hike, not a slow (with a lot of time for taking photo) one. I finally decide to take with me Altissa Altix-n camera. Nice little “guess the distance” all manual rangefinder from former Eastern Germany. Maybe it would be better an SLR with wide angle prime, but it was very foggy and moist, and don’t know how would electronics in SLR I own would works in those conditions. So I’m pleased with my choice but I didn’t really have time or strength to really photographically enjoy this trip. But I was there, on the top, that is all it counts, at least for me.

Matjaž