26.9.12

Portfolio of the Week: 4Spo


Dear Readers,
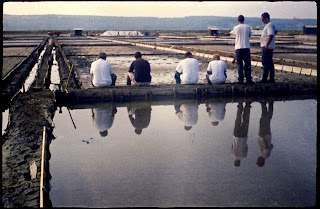
We have moved back to Germany and feature another great photographer from this great country, 4Spo. Of course, 4Spo is not his real name, as he wanted to preserve his privacy, but that's his username on Flickr. And that's OK, we respect your privacy-it's your work that counts. He is with no doubt a modest guy, even though his work tells another story, and he mainly defines himself as a fan of Peter Lindbergh.  No doubt he is a die-hard guy as well! After a few years, he happily came back to film, using the many fine cameras in his possession: Leica, Plaubel, Hasselblad, Nikon etc. He has no particular preferences for film brand or type, but he likes very much expired film for its unpredictability and the effects it gives. Possibly with the lens wide open-another bokeh fetishist, I would say. He states that he likes the subtle eroticism in photography, with a nice bokeh, with the great help of film medium. And he obviously makes his job right! Also in the fashion/editorial field.  Enjoy his work! 4Spo's work can be found of Flickr on his website, along with his colleague work.
Mitja


All photos copyright: 4Spo

24.9.12

Monday Column: Analogue Photography as Escape from Digital World - Part II


Last Monday column I wrote about analogue photography as escape from digital world.  In this column I will tell about things in analogue photography that differentiate analogue photography from modern digital world and which I love.

 
You are already familiar with all sorts of digital and electronic helps and shortcuts found in modern digital and not so modern analogue cameras. A few classical photographic electronic helps found already in cameras made in 70-ties and before. We are all familiar with metering in our cameras, P, A, T (S), and M modes. Aperture and shutter speed is controlled electronically from mid-seventies Canon AE1 camera or maybe even before that. Now days you have face recognition, smile shutter, all kinds of scene modes that help consumers, amateurs (not that I underestimate amateur photography and “casual” photographers) and people who know nothing about photography except phrase “smile” or “cheese” and then they press shutter button in one move, all way down... There are all sorts of these so called scene modes; from helpful like portrait, landscape and action, to downright bizarre ones like candlelight, sunset, food, party, or even pet scene modes. And then are so-called effects, for people who are not familiar with post production, like B&W and sepia, or effects that simulate some legacy film emulsions, or even pin-hole effect, and so on... Better I don’t write about live view and video in modern cameras. Sure I missed plenty of them.
 
Electronics, firmware and hardware are developing in very high pace. So every year we have new “useful” features. Some are turning out useful and most of them really are not. Some of this year’s “new photographic” features are: Wi Fi incorporated in camera, so you can control camera by your phone, and wirelessly transfer images, camera equipped with phone android operating system, so you could benefit with all sorts of application, useful or not, for your camera. And also you can share freshly taken photos on your favourite social network... But feature that stroke me most is that on one of new camera that was presented from giant in consumer electronics at Photokina last week. It is called Auto Portrait framing function. When it’s enabled the camera use face detection to locate your subject, crops the image based on a rule-of-thirds, and resample the picture back up to the same resolution as is the original shot. Effectively camera decides about framing instead of you!!! Where this is going I think don’t need to tell.


So whatever these are useful, helpful and needed photographic tools, I prefer a purist way of taking photographs. With all manual and mechanical way of controlling my camera. So when I’m taking pictures and they didn’t turn out in the way I wanted to, it’s only my fault. I prefer working with my light meter, manually turning knob to specific shutter value, turning the aperture ring on selected f stop, zone focusing and manually rewind the film... And then, when I press the shutter button, it’s a pure mechanical joy!

21.9.12

Cottage Tip: Building a small exposure meter-Part I


It has been said that necessity is mother of all invention, but I disagree. Other »mothers of invention«, in my view, are also vanity, frustration and other »virtues«, but they are often confused with the first mother, necessity. Anyway, there too many things to list humans invented just for the sake of their own satisfaction, not really necessity, and some of them are even nice gadgets.
I always »needed«-actually just wanted to have-a small, pocket-size exposure meter, but never wanted to spend a small fortune for one. I have my trusty, almost 20-year-old Minolta Auto Meter III which never let me down. But it is a bulky meter. I just wanted to have a small meter when I get out with a 35 mm camera, with no bags or whatever. Thus, the meter should fit in a small pocket. You can even get an old used one for about 20€, but they tend to be unreliable and in many cases, not working. You can get the small and sweet Sekonic Twinmate, but I just never wanted to spend some 100€ or so for one. Nowadays even less so, since for the same money you can buy a film SLR in very good condition....
So, the plan is to build one simple but precise (enough) incident light meter for about 20€ or so in materials and components. The exp.meter must be:
-small
-lightweight
-simple (both in operation and circuitry)
-precise within ±0.3 EV
-usable at least from 15 EV (the »sunny 16« conditions) down to about 4 EV (exposure value, ISO 100)-this is also the range of many commercial meters
I already checked the availability/pricing of components, but they still need to be delivered...in the mean time, I'll lay down the theoretical aspects of this building issue.

The sensor
The easiest approach (and maybe even the most effective) is to use a CdS (cadmium sulfide) photoresistor (light dependent resistor –LDR). It has  the nice property of a logarithmic response (of its resistance) to lighting conditions, but inversely (the resistance decreases with increasing illumination).  The EVs we deal with, are also a logarithmic arrangement, since by every EV step the lighting conditions change by a factor of 2 (1 stop). We can thus get (with a bit of gimmicks) the electrical output (current or voltage) directly related to the EV value. But we also need to make first an appropriate light diffusor (and attenuator) for the sensor (since they are quite sensitive).
The display
The nicest way would be to use an analog milliammeter or millivoltmeter, but unfortunately such small meters are very hard to find, plus they are substantially more expensive than their digital conterparts-and then you can be quickly out of budget just for the meter! Digital millivoltmeters (we need them in the range of ±200 mV) are quite expensive (10-15€), more than half of the budget, but they include all the necessary circuitry for a precise metering. They usually run on 9 volts. You just provide a battery source and the measuring leads for your signal, and of course, some room in the housing of your meterJ The use of a 7-segment or LCD display (while cheaper) would dictate the use of the necessary A/D converter and drivers chips, which would substantially complicate the circuitry and eventually, you could spend (more or less) the same amount of money.
The battery
An ordinary 9 volt battery is just fine, but not of my taste-too heavy and bulky. Instead, you can get a 9V battery of the 23A-type(used in remote controls), but very rare. Or you can use its 12v counterpart (also used in remotes), since its easier to get and cheaper. Smaller than a AAA battery, and you can even adapt a AAA battery holder for it.
The housing
Any plastic case of suitable dimensions can do the job-you can even recycle some old stuff. Or you buy one for a few € or $. Just be sure it can fit the voltmeter, the battery and the circuit. Along with the housing, we also need a switch to turn on the circuit for metering.
The circuit
I really like simple things, so I did not include any integrated circuits, only discrete components, and the least amount of active (semiconductor) components as well. In the hand-drawn circuit draft shown below there are no actual values shown, since I don't know yet how the LDR will behave. Only after that I can calculate the actual values to fit my needs. But I do know that I want the output to be 10 mV/ EV (for increased accuracy); at 15 EV (»sunny 16«) I want to get as close as possible to 150 mV, while at the low end I want about 40 mV for 4 EV.
 

The resistors Rz1 and Rz2 are just regulating the currents for the voltmeter and the sensor circuit, respectively. The first Zener diode ZD1 serves to supply the 9V needed for the voltmeter, while the ZD2 will be set later, when the LDR behavior will be known, as also the values of other resistors R1, R2 and R3. But we do know that the output will be according to this formula:

UOUT= (UZ2 * R1)/(Rx+R1)  * R3/(R2+R3)

So we have 4 parameters to play with (UZ2 and R1-3) to adjust them to our needs. Maybe we can later add a couple of diodes to adjust the input voltage level, but we'll see. Anyway, I like this simplicity and I just can't wait to do the actual test, next time.

19.9.12

Portfolio of the Week: Gaston Torres


Dear Readers,
This week we move to Buenos Aires, Argentina, to meet another one-of-a-kind photographer, Gaston Torres.  First, I must state something about his person: as I found out during our correspondence, he is an exceptionally cooperative and kind person (well, all photographers so far have been so, not to be mistaken), in his very own way. He is primarily a 35 mm fashion photographer, using different cameras and mostly color neg film, even for many of his commercial assignments and editorials. His talent is instantly obvious, once you see his work, as he is capable of handling both very complex and also very simple photo setups. By simple I don't think it as a diminutive, on the contrary. And especially in those »simple« (film) photo shoots I think he really excels in. He did a very good job on the  recognizability of his style, although I am having a hard time how to clearly define his style.....since his photos emanate quite some ambiguity. After a long thought, however, I think the best way to describe Gaston's style is a »an elegant mix of Terry Richardson and Nobuyoshi Araki, with a pinch of Helmut Newton«. I openly invite you to visit Gaston's work on his website and on his photostream on Flickr.
Mitja


 All photos copyright: Gaston Torres

18.9.12

"Film Lives: The Enduring Allure of Analog Photography"

I thought it would be worth to post the link to this contribution appeared in Popular Photo last week.There are a few featured photographers in this article, among them Michael Massaia, Dina Kantor and others. While from the technical point of view there are no new statements made to us, analog photographers, it's just nice that some things get reminded once in a while; even for contemporary professionals, film has some distinct advantages. The biggest one today is surely standing out of the crowd of the digital majority, because film has its own specific look. Take it to your advantage!

17.9.12

Monday Column: Analogue Photography as Escape from Digital World


What’s the reason to practice an analogue photography? It is because it’s better than digital? Or maybe it’s not better quality but better looking? Maybe it’s the reason the thrill of unknown, the so called chocolate box effect; that you never know what you will get until you develop the film? Or maybe it’s all about the feeling of operating the beautifully crafted mechanical photographic box?


We live in a frenzy world. The photographic technologies are developing too fast for my taste. They are excelling and superior at first sight. But like fast food tasteless and fatting (your mind). Photographically I’m a digital child. So I often catch myself just shooting (with my digital camera) at my photographic subject/object without thinking about it. And when I’m not satisfied with the results I just shoot more. But when I’m shooting with a vintage camera loaded with film I just switch the mind. I’m suddenly aware of my subject/object, I think about it, how to capture it without ruing my film. I’d had a success ratio about 25-30 frames of 36. How many do you think I had at same time shooting digital? Ok. I’m improving and I’m trying harder with my digital camera. So I’m improving my digital success ratio. But without analogue photography I would remain without experience that only shooting film gives you. Its calmness, some kind of therapy how to heal of digital frenzy that surrounds us every moment of our lives. And that’s just one reason why a photographer should practice an analogue photography.


I think that every photographer it has his own reason. Or reasons?  What’s mine? I’m not really sure. Analogue photography exists officially from 1839 when Louis-Jacques-Mandé Daguerre presented to French Academy of Sciences the first photographic process in the world. So the analogue photography has at least 170 (or more) years of history. How many photographic processes, techniques, cameras and films were developed and worth to try out in that time? I’m interested in many of processes, techniques, cameras and films and in some not so much. In contrast digital photography exists only a decade or so (at least when majority of photographic professionals migrated to digital). Maybe in the future our grandchildren will find technology of today relaxing and interesting? Who knows?


14.9.12

Cottage Tip: Densitometry Simplified


Densitometry and optical density seem to be a very abstract topic to too many photographers, but they're not. Optical density is in fact a very handy way to express the loss of light through a medium; in our case photographic film or paper. It is a valuable tool for image analysis.
Optical density is defined as:
OD = Log10(Io / I), where Io is the non-attenuated light intensity (e.g. light reflection from blank paper base) and I is the attenuated light intensity (e.g. light reflection from an image area of the same paper)
In case when Io / I = 2 (the light intensity halves, i.e. is reduced by one stop), the density value equals to 0.30 which is a very handy number to deal with.
Very unfortunately, dedicated densitometers are quite expensive devices, even used ones. A new one can easily cost you about 1000 € or even more. If you're lucky, you can find a used one for a few 100 €. (And you still spend the same amount of money as for a SLR in good condition). Here I show an example how to make densitometric measurements of reflected light (i.e. from prints). Everyone who has ever dealt with alternative printing techniques has noticed the expression »image density«, be it for a cyanotype, platinum printing, and of course gum bichromate printing. Or any other technique. You can easily live without densitometry, but for getting consistent and predictable results in your printing, it is better to use it, especially in color or multi-layer printing. And you don't even need a densitometer. For densitometric measurements of acceptable precision, you need just a decent SLR or DSLR with spot metering capability-it is better to have a camera with 1/3 stop setting increments, but you can get along with a camera with 1/2 stop settings (like mine). For total (visual) densitometry, this is all you need. But for measuring the density of all three image-forming colors in color printing (yellow, magenta, cyan), you will also need a set of RGB filters. They need not to be the expensive optical quality filters-a set of RGB lighting filter gels (like Lee) are just right for the job, provided they faithfully represent the three primary colors (red, green, blue). You can buy a set of them online for a few €. I cut them in 75x75 mm squares and I hold them in front of the lens when I take the measurements.
The measurements were made with my Canon EOS 5, set in Av and spot mode. Aperture f/2.8 and ISO 100. Illuminated by window light.
Measuring is easy, just set your camera in aperture-priority mode at the aperture and ISO setting at your convenience, set the spot-metering mode, and place you print on an evenly illuminated surface. And you don't even need to have a focused image (actually it is better not to). First take the reading of the paper base (in secs) and then on the spot on the image you want to measure.
Say, you got these two readings for paper base and your spot of interest, 1/45 s and 1/15 s, respectively. Now you calculate the logarithm of their inverse values (actually their camera readings):
OD = Log10(45 /15)= 0.48
This value tells you that the reflected light on that spot is attenuated by about 1.6 stop.
For the sake of illustration, I prepared a sheet of drawing paper (see above) with spots of different colors approximating the black and the complementary colors (yellow, magenta and cyan) differing in intensity (density). They are made with pastels and are by far not ideal, but they show the basic principle anyway.
When you want to measure the density of the yellow color, you measure it with the blue filter in front of the lens, since blue is complementary to yellow. For magenta, you use the green filter. And for cyan, the red filter. This is because you want to block the other two colors during your readings. Write down your readings and the calculate the logarithm values. These are the densities of selected image spots. Easy, isn't it?
Of course, these measurements are not super-precise, but they can help you a lot when you engage yourself in alternative printing.
The tools I used to measure the densities: my trusty SLR, and for YMC colors, the 3 Lee filter gels-red, green and blue. Pocket calculator not shown :)